What it is
Each cashier has a name and a code to approve payments at the Register. They don't need an email or an account. That way every sale is tagged with the name of whoever rang it up.
Step by step
Open Cashiers
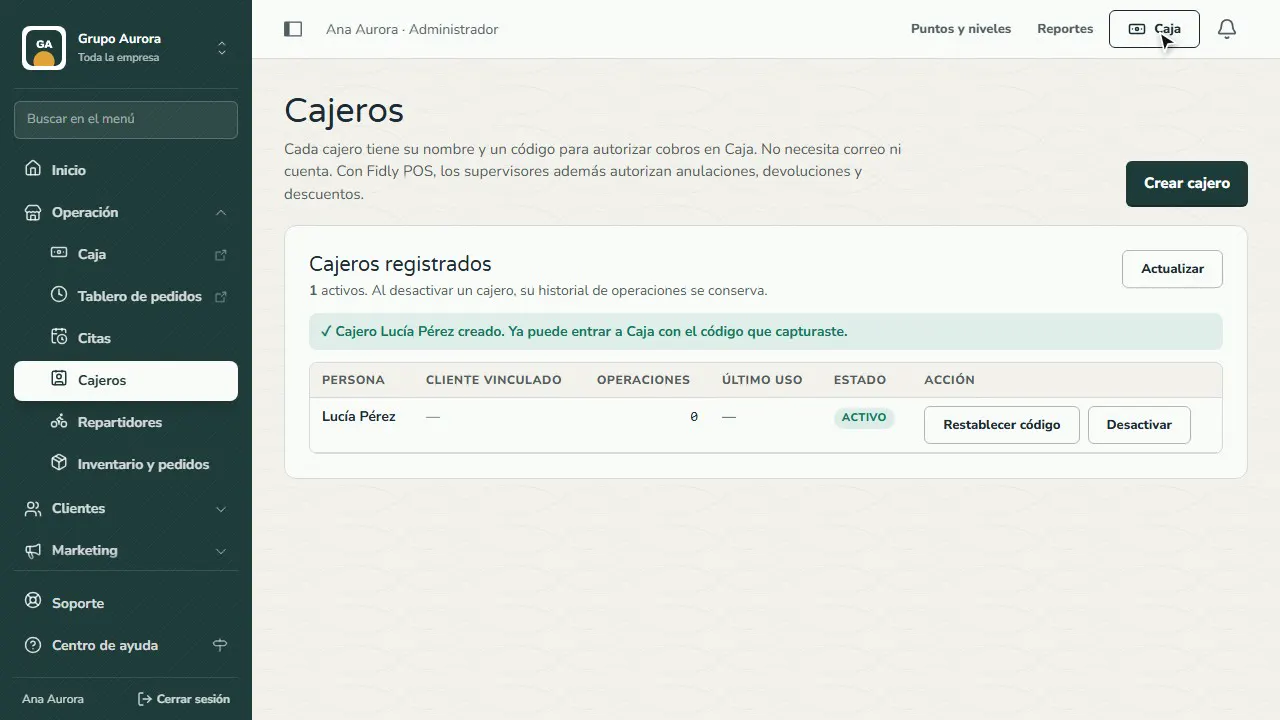
In Operation › Cashiers you'll find the people who take payments at your counter. They don't need an email or an account.
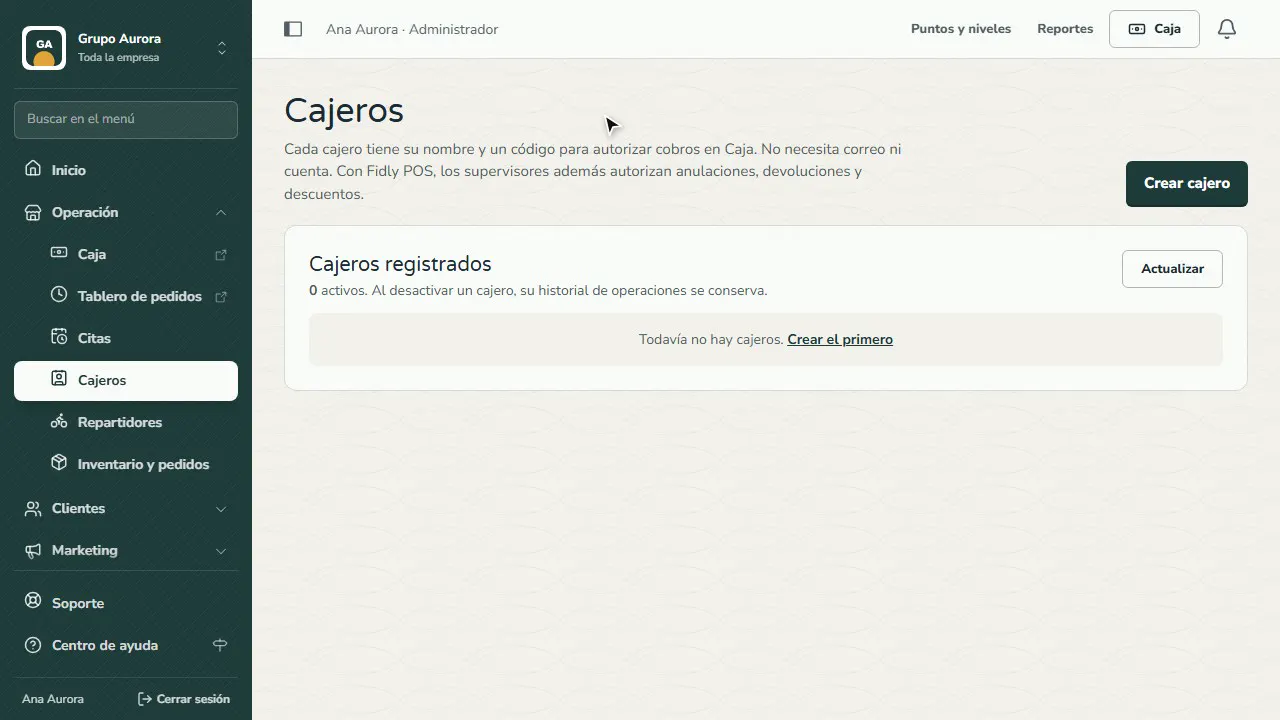
Create the cashier
Tap Create cashier.
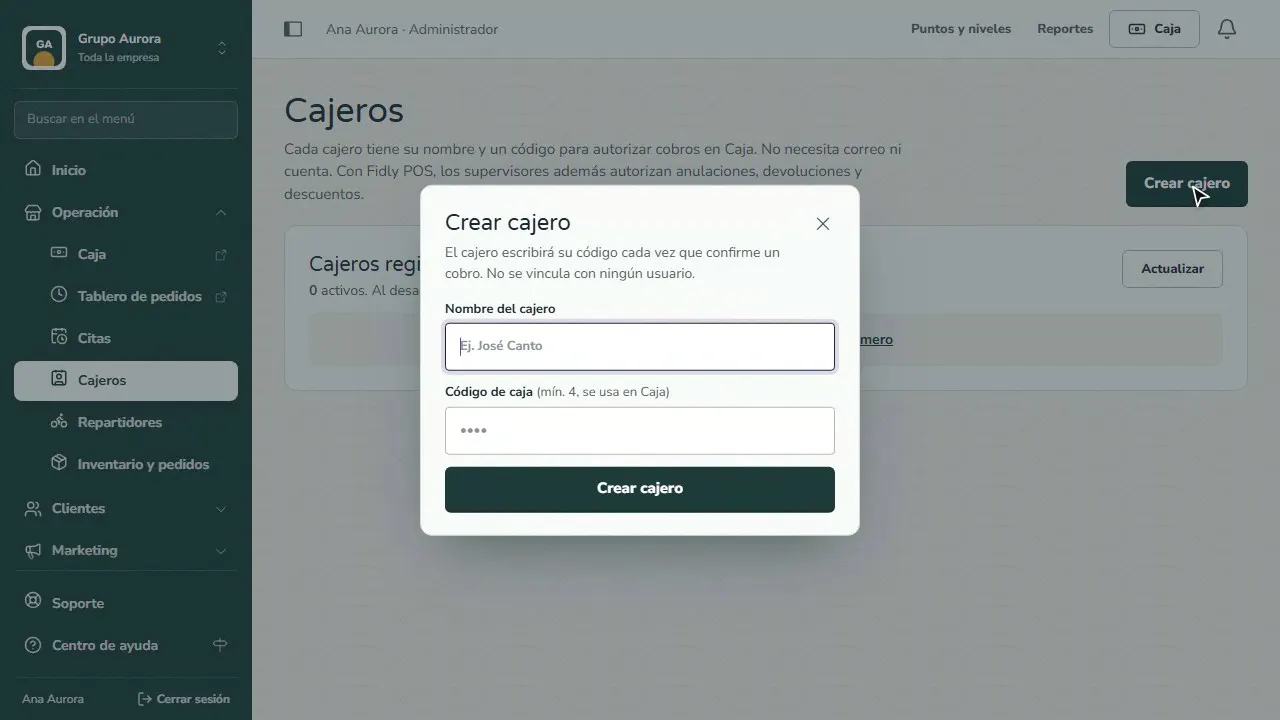
Name and code
Enter their name and a code of at least 4 digits that only that person knows.
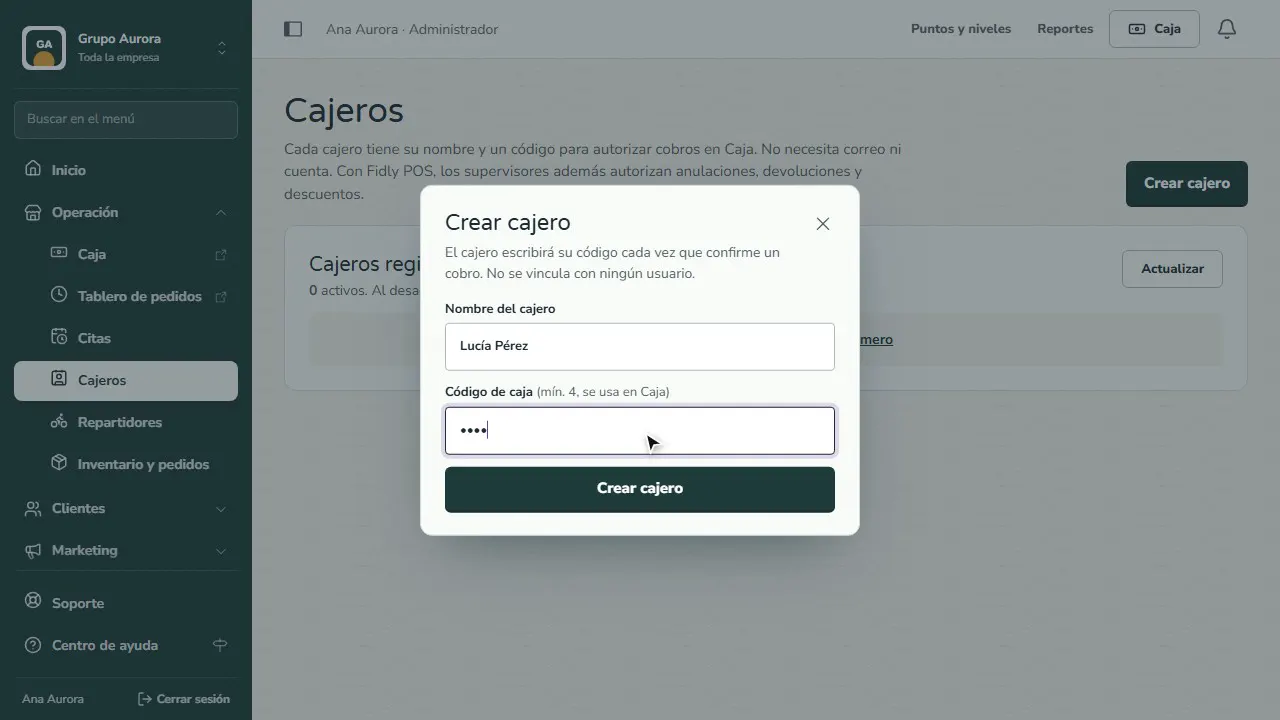
Save
Tap Create cashier: they now appear in the list, and you can change their code or deactivate them anytime.
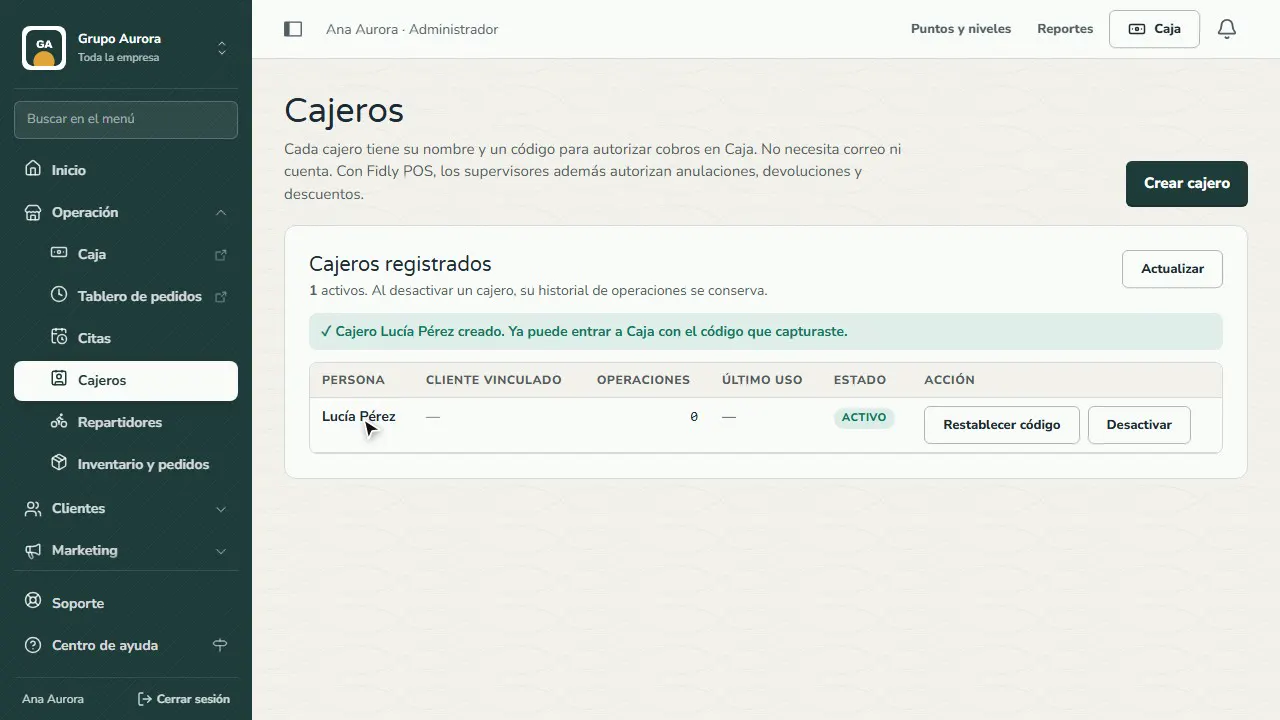
How they use it at the Register
At the Register, the cashier enters their code to confirm each payment; that way your reports show who charged what.
Common mistakes
- Sharing one code among several people. You lose track of who took the payment; create one cashier per person.
- Deleting someone who leaves. Deactivate them instead: their history is kept and stays in your reports.
- Giving everyone supervisor permission. With Fidly POS, the supervisor approves voids, refunds and manual discounts; give it only to managers.
Tips
- Use codes of at least 4 digits that aren't obvious (no 1234).
- If someone forgets their code, use Reset code.
- Compare your team in Reports › Analytics › By cashier.