What it is
In Operation › Tables and QR you draw each branch's floor plan by floor or area and get the QR for each table. Customers scan it with their phone, see the menu with your products and order without signing up; if they log in with their account, the purchase earns them points.
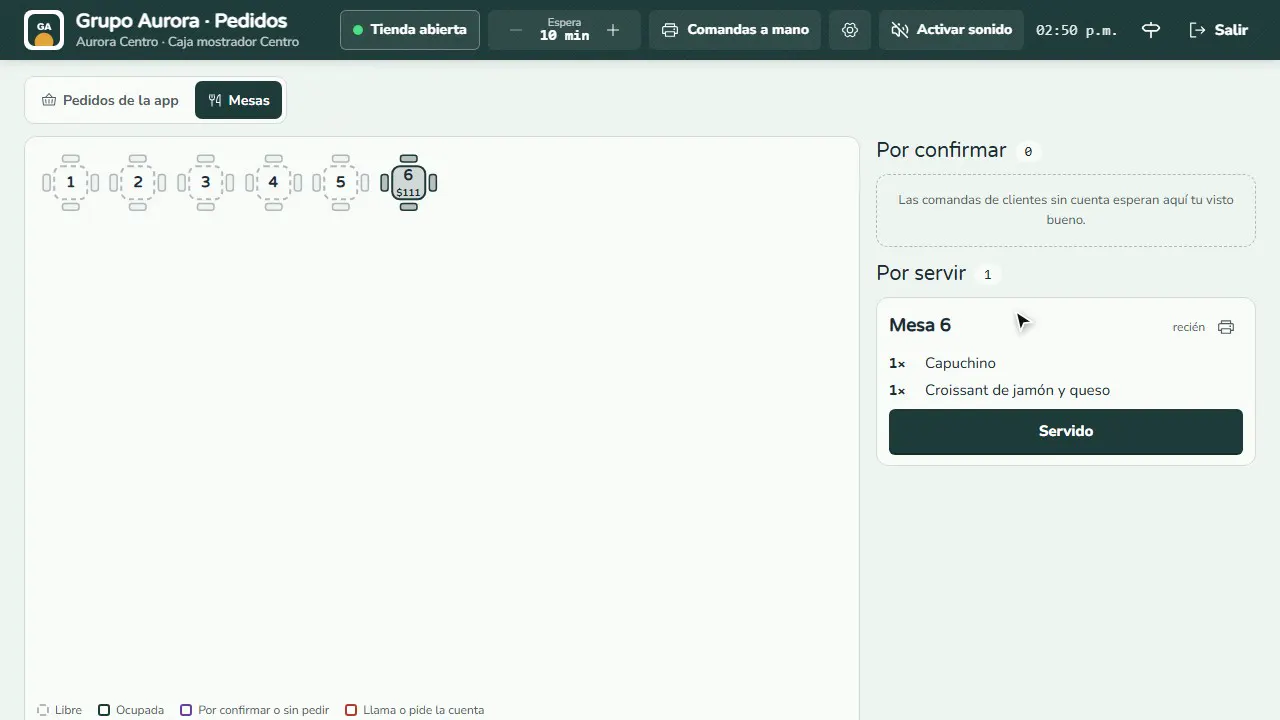
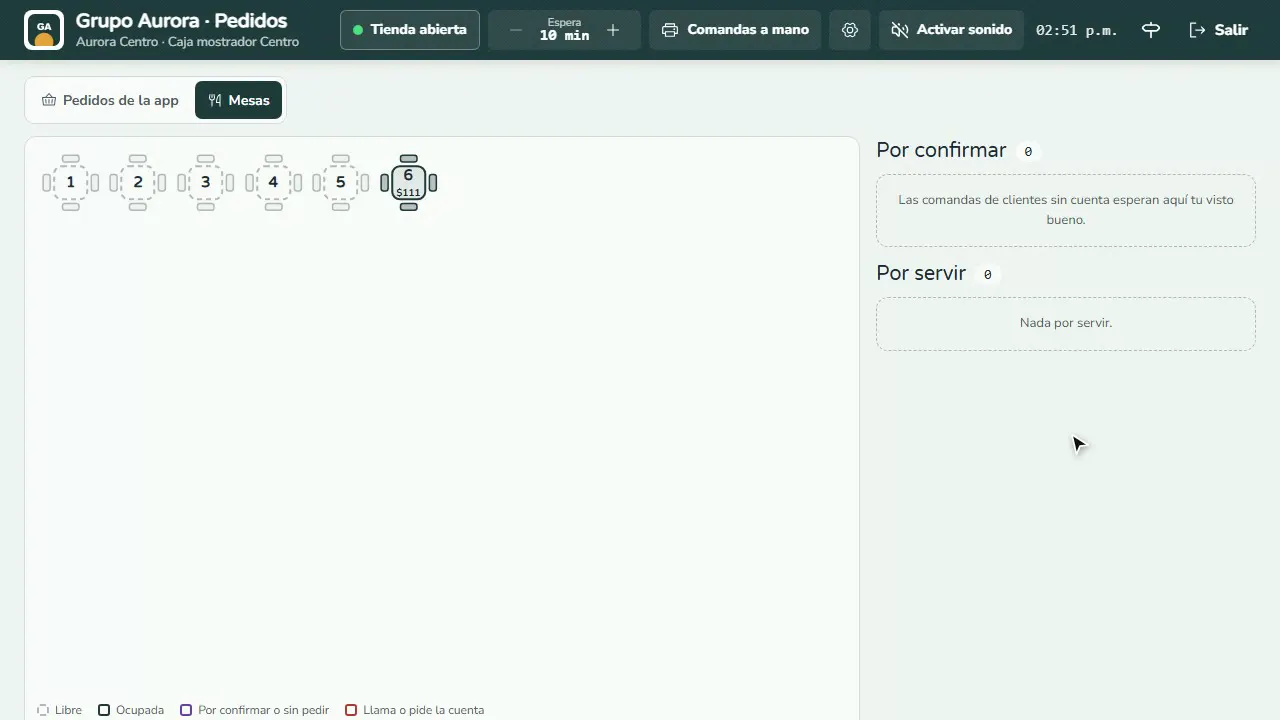
Kitchen tickets arrive at Order board › Tables: tickets from customers without an account wait in To confirm (every QR order waits there until a cashier confirms it with their code; see Confirming table orders) until the server accepts them; then they move to To serve and you mark them Served. The table stays open with its bill until you charge it in Register › Tables.
With Fidly Mesas waiters carry the floor plan on their phone: open it at /mesas and install it with its own icon and it alerts them, even when closed, when an order comes in or a table calls the waiter or asks for the bill. If you assign tables to each waiter on the floor plan, they pick their name under My tables and only see highlighted, and get alerts for, their own tables (and those with no waiter). Each table shows its status color, who serves it and a cutlery icon when something is waiting to be served.
Tables and QR is part of Fidly POS, the point of sale you add on to your plan.
Step by step
Add your tables to the floor plan
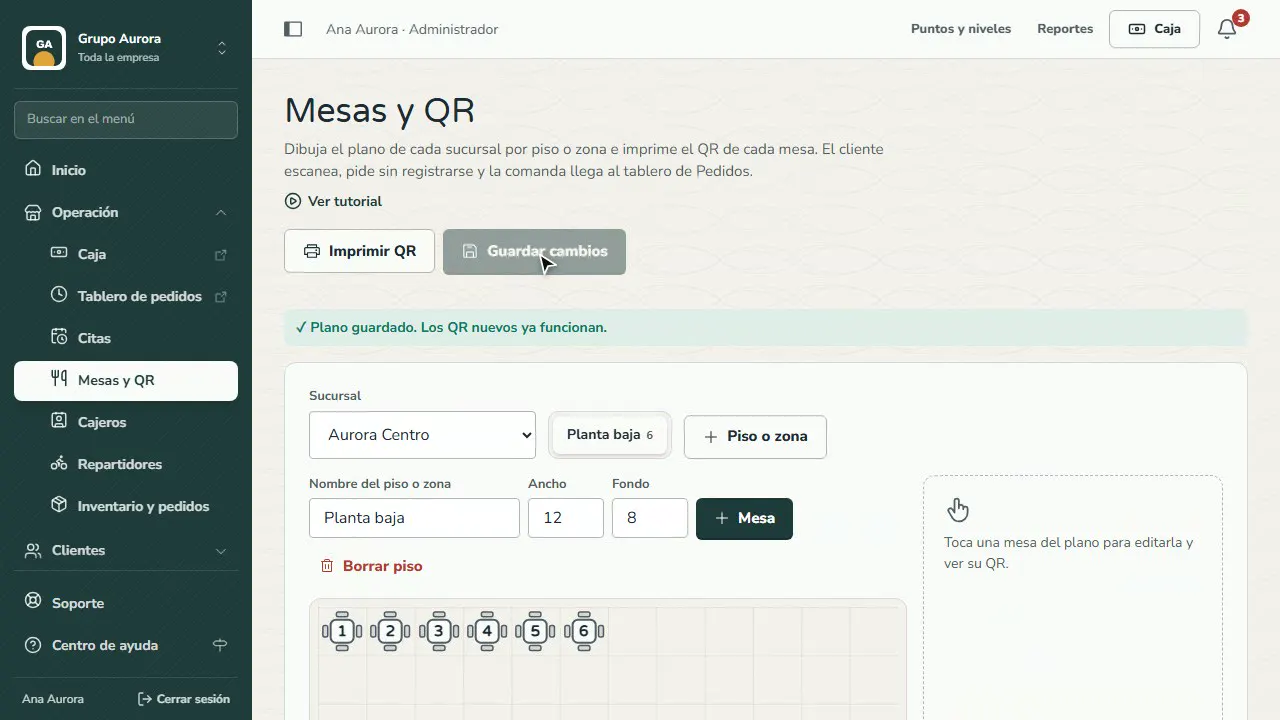
In Operation › Tables and QR, draw the branch's floor plan: tap Table to add one and then Save changes.
Get the table's QR
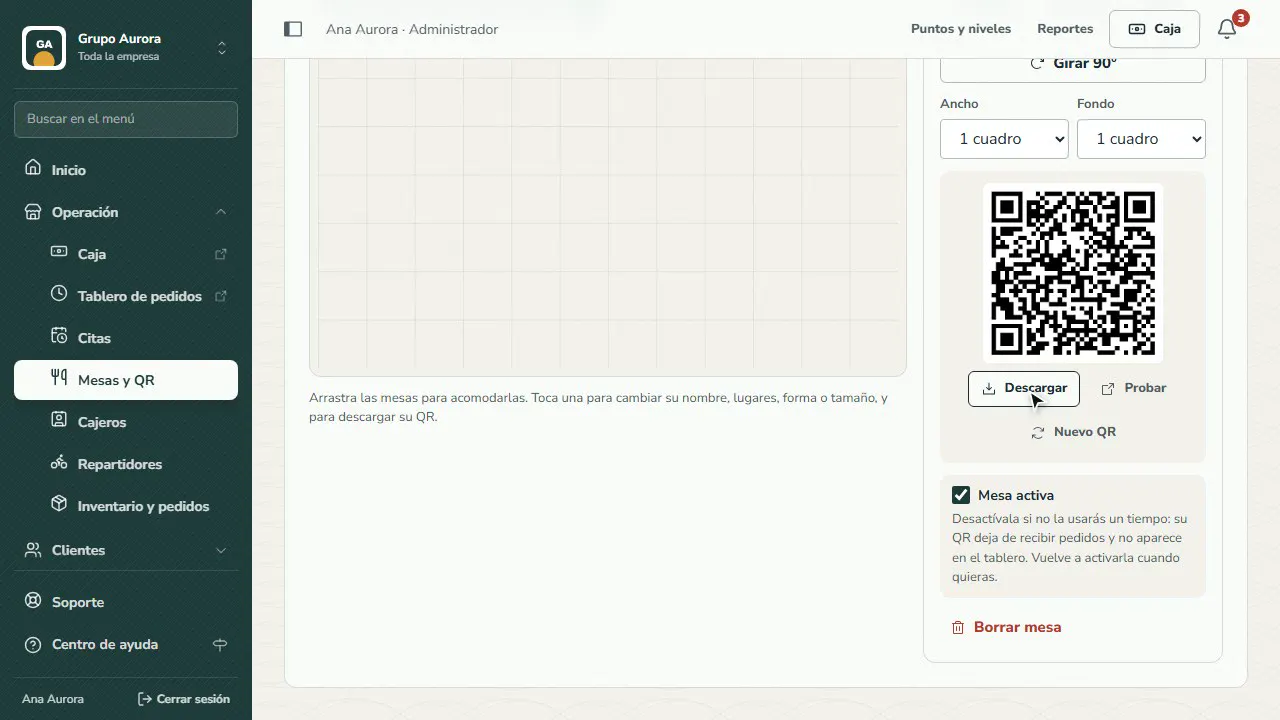
Tap the table to change its name or seats and Download its QR; stick it on the table (or print them all with Print QR).
The customer orders from the table
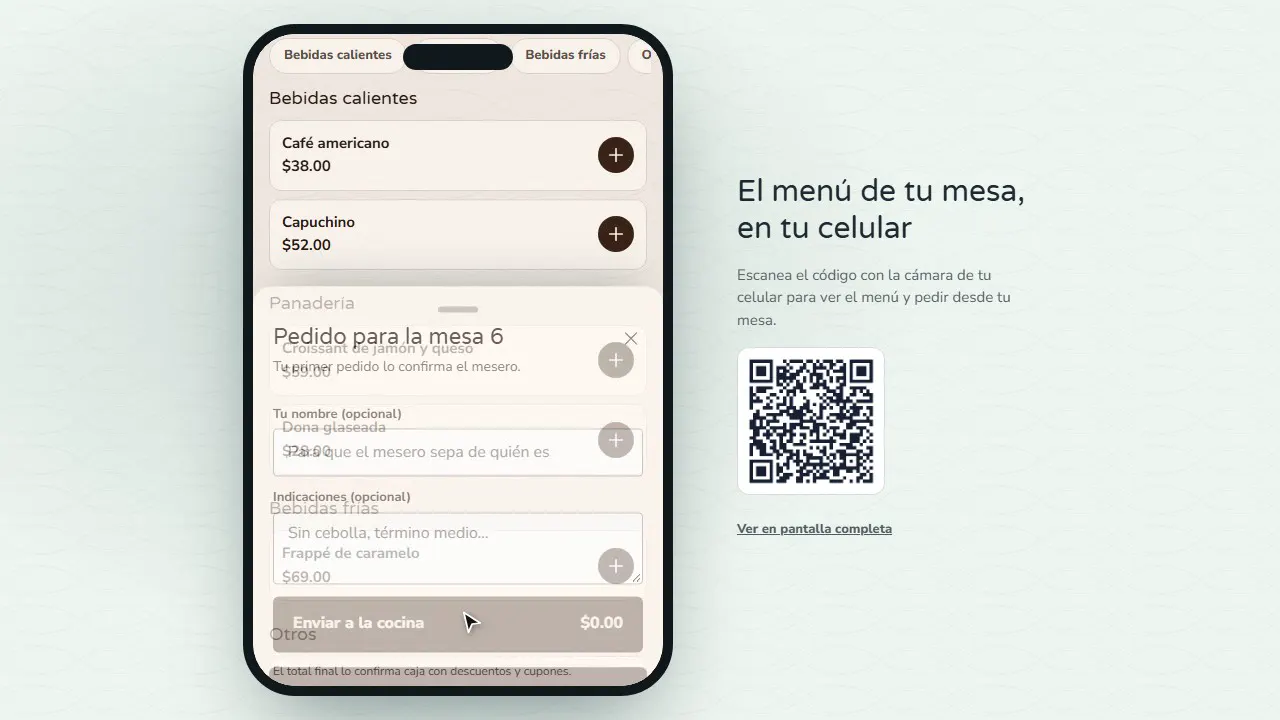
The customer scans the QR, sees the menu and orders without signing up: they tap Send order.
Confirm the order with your code
The order arrives at the Register and at Order board › Tables in To confirm: tap Review and confirm, enter your cashier code and tap Confirm and send to kitchen.
Serve it
When you take it to the table, tap Served. The table stays open until it's paid.
Charge the table at the Register
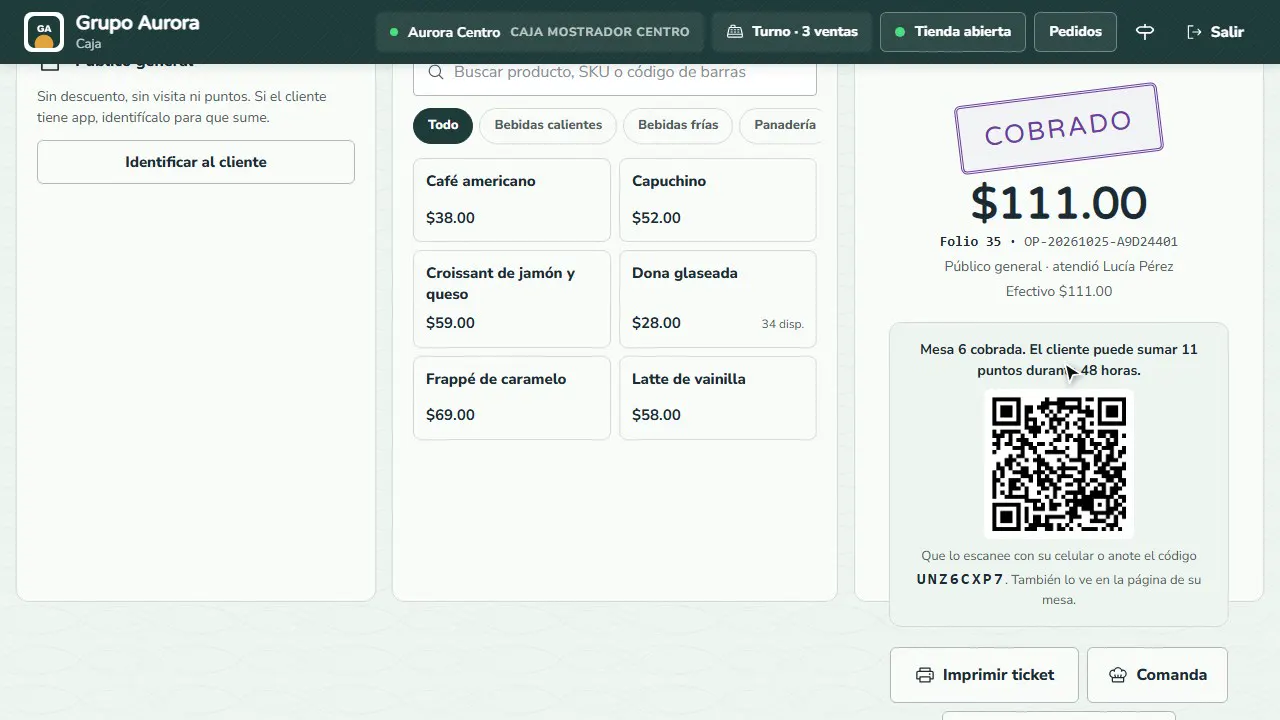
In Register › Tables, pick the table: its bill loads into the ticket. Identify the customer or charge without one; with the receipt code they can add their points later.
Common mistakes
- Sticking the wrong QR. Each table has its own; if you change the floor plan, check that the table number matches its QR.
- Leaving tickets in To confirm. Until someone accepts them, the kitchen doesn't prepare them: turn on the board's sound.
- Charging the table as a new sale. At the Register, tap Tables and pick the table: that loads its full bill into the ticket.
Tips
- Use Print QR to print every QR on the floor plan at once.
- If the customer has the app, identify them when you charge so they earn their points; if not, the receipt includes a code to add them later.
- Use New QR to invalidate a table's QR if it gets lost or copied.