What it is
Every register, every cashier and every sign-up QR belongs to a branch. Here you create it with its code, name and location, and assign it to a brand in a single step.
The location is required: mark it on the map (or with “I'm at the branch”) or enter its Google Place ID. Home delivery needs the spot on the map, and Google reviews and “Directions” use the Google ID. Older branches without a location show Location missing: they keep working, but complete it with Add location.
Each branch has its own sign-up link (so customers are tied to it) and its own register code.
Step by step
Open Branches
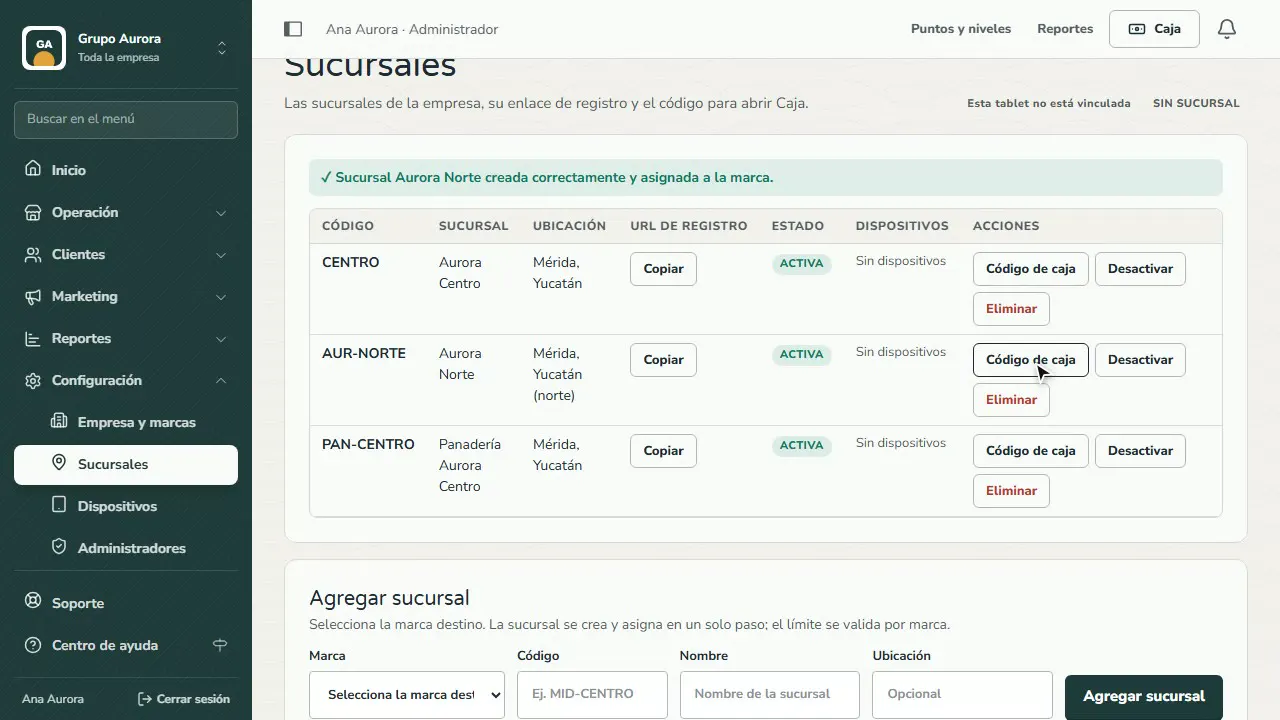
In Settings › Branches you see your locations, their sign-up link and their register devices.
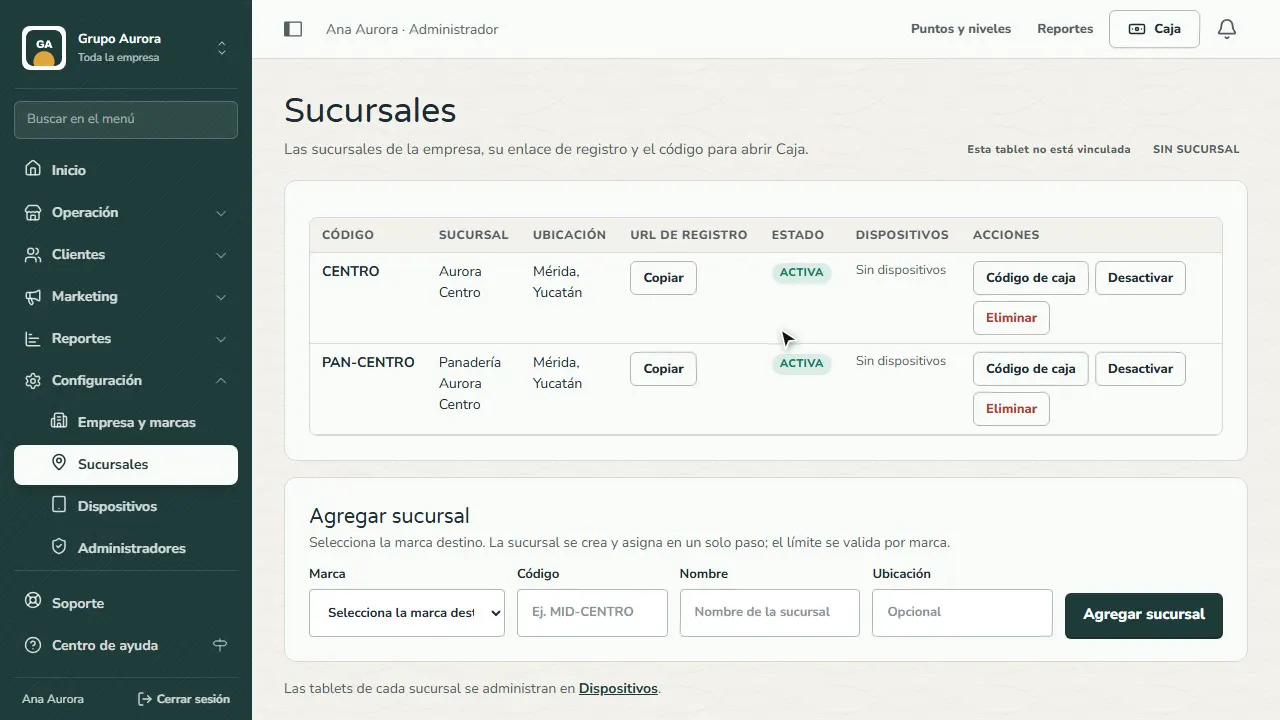
Choose the brand
Every branch belongs to a brand. Choose which one: here, Café Aurora.
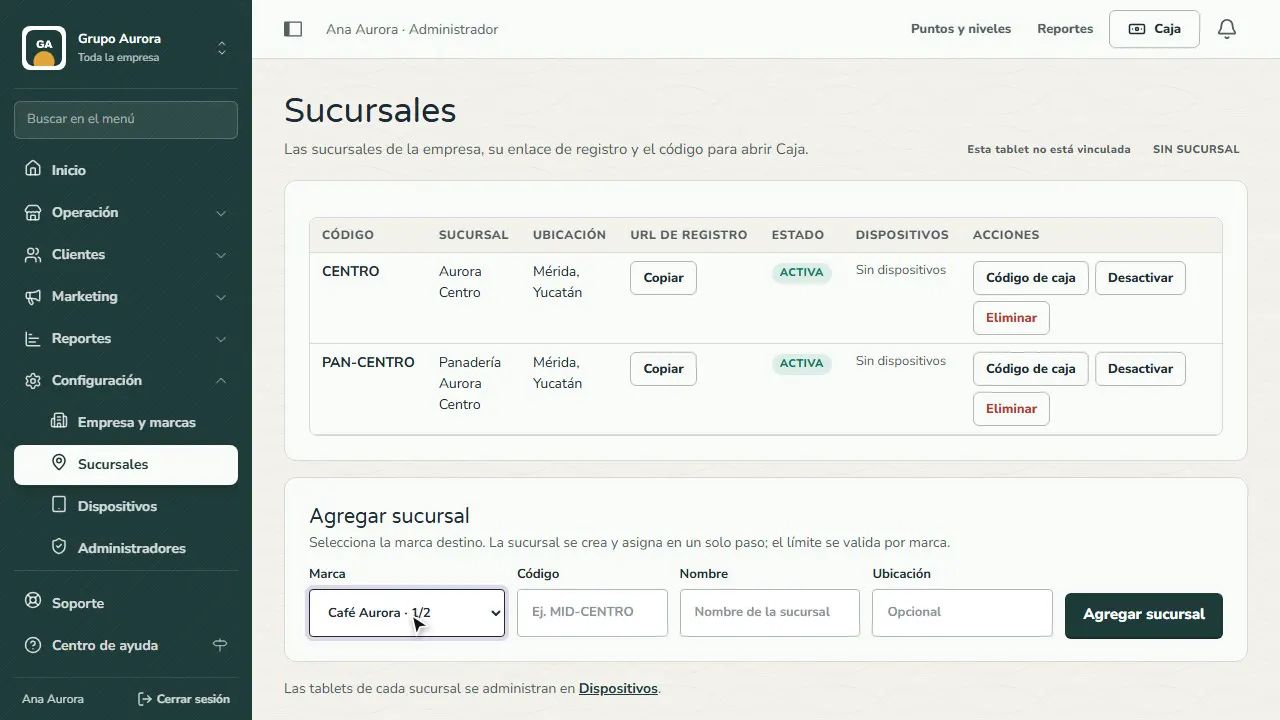
Code, name and location
The code is short and unique (it shows up in reports); the name is the one your customers will see.
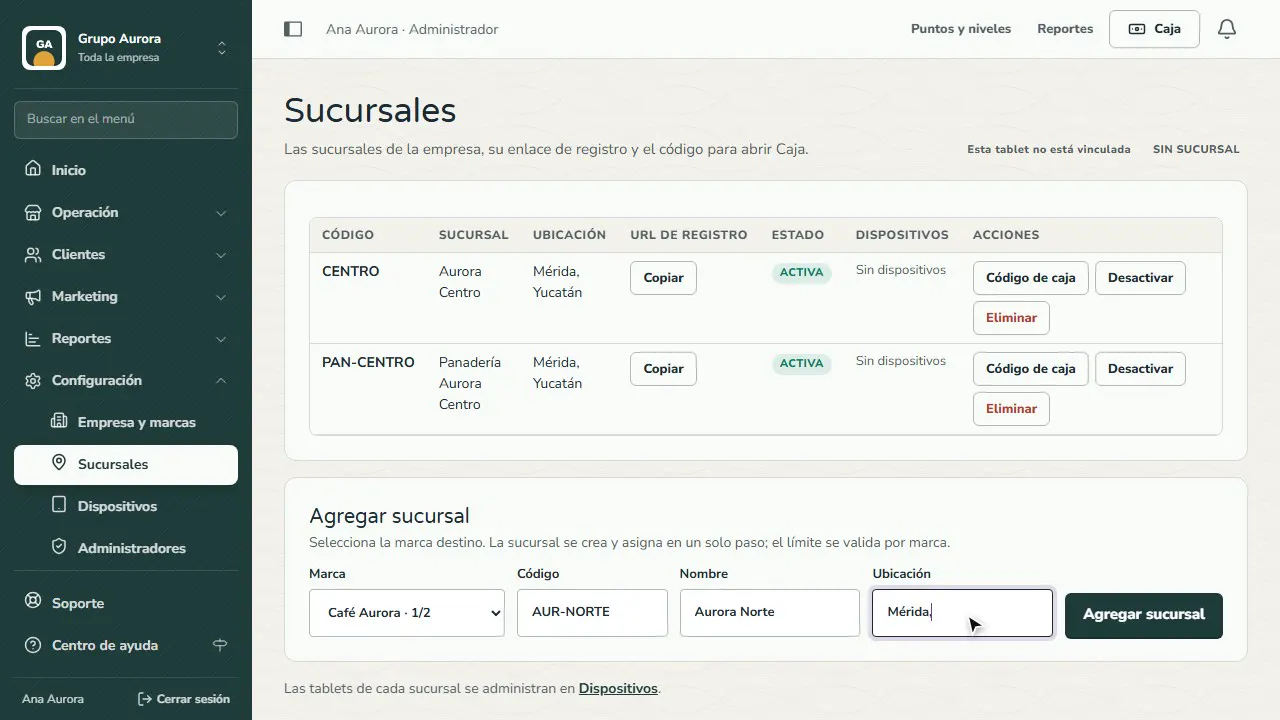
Add the branch
Tap Add branch: it's created and assigned to the brand in a single step.
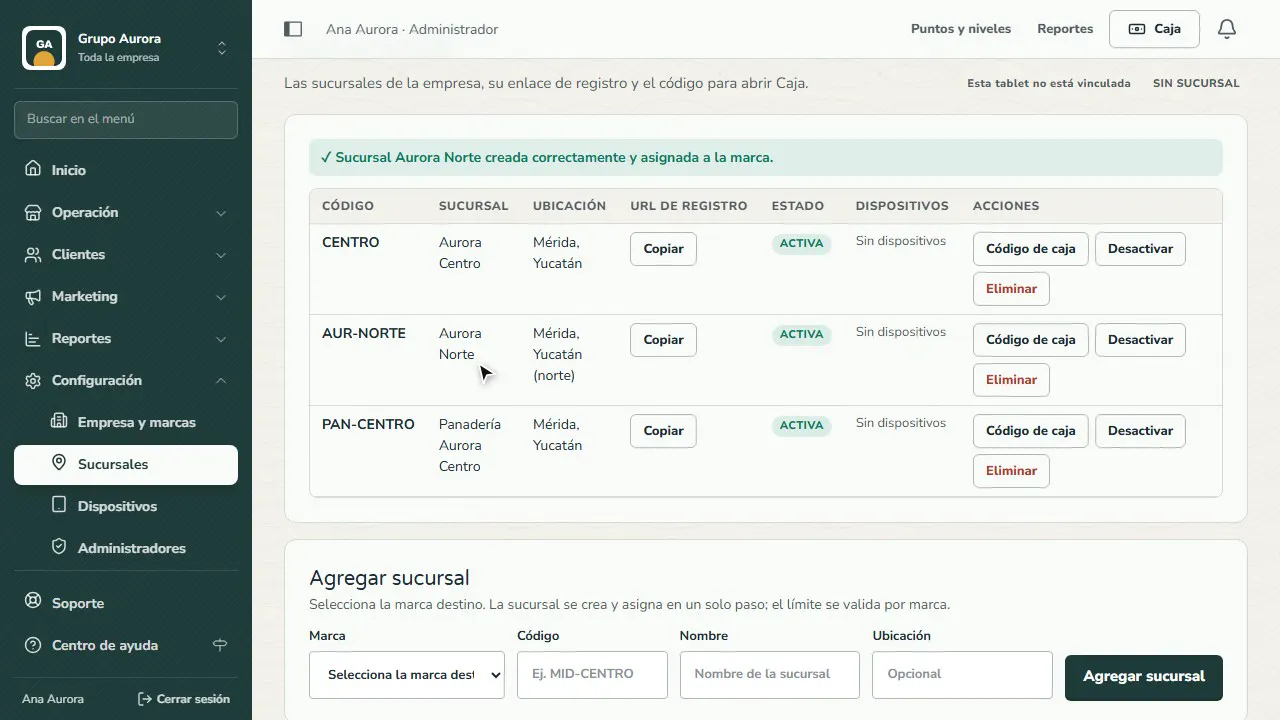
Its sign-up link and its register
Copy its sign-up link for the counter poster and generate the Register code to link its register device.
Common mistakes
- A long code, or one with spaces. The code shows up in reports and exports: something like MID-CENTRO is enough.
- Deleting instead of deactivating. If you close a location for a while, deactivate it: its history stays in your reports.
- Forgetting the register code. Without it, no device can open the Register at that branch.
- Saving only the Google ID if you deliver. Without the spot on the map, home delivery can't be turned on for that branch.
Tips
- Use the name your customers know (“Aurora Centro”), not the street name.
- Copy the sign-up link and use it on your social media or in that branch's WhatsApp.
- Once the branch is created, register its register device.